Posts

Animate Final Project

Image
 This project was easy and straight forward but after a computer crash, I had very little time to complete this project. I started with Brainstorming ideas. After I have decided everything and all scenes with Title names. and made some assets to do this stuff and found some to add to my project. At first, I created a landing page with a title animation and BBC logo with the Modern building Asset. Then I created a futuristic VR glasses type thing. And added various buttons to it. Like  Car  Drone  Robot  Food  VR  Info  Those buttons would navigate to their pages where you can get a glance at the future of those things. CAR In future, due to all pollution, we would use hybrid or electric cars more. I added this like with a car animation. Which in my view was really good. DRONE  I made two drone assets as read in my research that they would start delivering stuff in future. I Animated those two drones and also placed them on that page. ROBOT...

After Effects 3D Tracking Assignment.

Image
 For This assignment, we were supposed to track footage in 3D space Stick a 2D media piece to it and make it look believable. This was a very complex yet fun project.  We had to shoot our own footage but unfortunately, I was not able to do so However we were also allowed to use Stock footage of some sort to do our work. So I went ahead and found some practice files from a youtube tutorial. The tutorial was very good after a glance at that I started working on my own project. After importing the video and other files of city Destruction. The first thing was to 3D track the whole footage and wait for markers to show up. when it happened I first duplicated the layer and named it 3D tracker. Thereafter I created a solid camera with help of those markers and Stick a Destruction picture.  After I placed this in that building the first thing I noticed was color difference so I had to color match both of the things using curves effect. Thereafter I  tried the new technique i...

After Effects Motion Graphics Assignment

Image
Following that, the project's guidelines were presented. When I was looking for a phone to buy, it came to me when I was thinking about ideas. I went to a few websites and found the iPhone 13 images. I began working on them. In Photoshop, I had to tidy up the background and cut off photographs. That was not an issue because After Effects enables PSD export. I wanted to design a low-budget iPhone advertising for the overall idea. This video depicts the iPhone's introduction and various characteristics. To begin, I viewed several recordings of these commercials. Then the ideas started to flow, and the first thing I did was pick a colour palette, which is at the heart of every motion graphics project. Choosing a colour palette and basing your work on it. Because the phone was green, I chose to go with green. Then I'll go with this.  Then I began to create several compositions using various text and picture animations. I made use of pre-existing 3D text effects. I applied a vig...

After Effects : session 4

Image
 In today's session, we learned about the 3D cameras, space, 3D layers Animation and 3D perspective. We started by pre-made project with multiple views and added our 3D animation to layers by enabling the 3D option in layers. After that bit we learned about the 3D cameras (one node) We went through their camera settings and other options We animated that camera with respect to our layers animation.  After this was completed we were given a task to create our own 3D scene with 3D layers and animation with a 2 node camera and depth of field. The two-node camera has a point of interest so was can animate the camera with respect to that point which gives a much more smooth outcome. This camera was very close to the real one because it had all the options like depth of field, aperture and focus distance which focuses on a particular layer that we want. So we created our whole scene like this by animating the camera and all other layers in 3D space and we kept focus on basket carryi...

After Effects : Session 3

Image
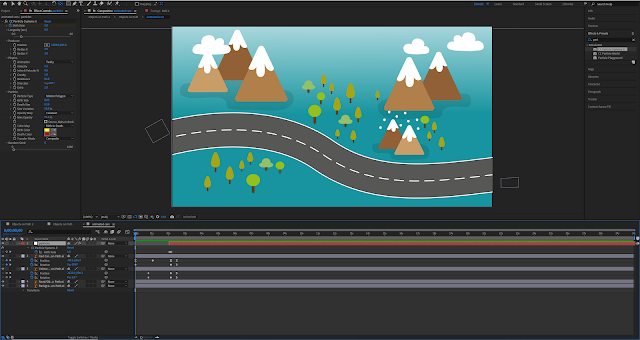
 In today's session we were going to learn about ~ Animating objects along a path  particles wiggle expressions Puppet tool Roto brush  So we started with provided assets for our project . It was a illustrator file with different objects in different layers so can animate it.  We started by importing Ai file to composition as composition and with layer size. Then immediately started animating cars along the road and animated them colliding using position and rotation. To make animation smooth we used graph editor and easy ease In .  There after it was time to add particles to make collision look more dramatic. We added a solid layer to the comp and added a particles system preset to it. Then we had to tweak settings a bit to get desired results. We had to trim the layer so particles only comes up in required time.  To add a little more drama to the accident we added a wiggle expression which is shake or jerk in camera. We discussed about what does the expre...

Animate: Making Scene Transitions and Walk Cycle

  This Activity was very simple and based on Opacity transition which means the transition between two footage or clips by fading away from one another.  We started by creating a new document named city example with; Width: 960    Frame Rate: 30  Height: 640    Platform Type: HTML5 Canvas Then we made 7 new layers for, Actions, Labels, Buttons, City_day, City_night, Sky_day, Sky_Night.  Thereafter, We designed skyscrapers according to our perspectives and added windows and colours with a background of Day and night. However, We had to convert the Buildings and Background into a symbol of the movie clip to animate it in different colours and animate windows.  Then we duplicated it and used the same symbol as the night sky and night buildings. Then we changed things in night assets and drag dropped them into our main scene.  We worked on buttons once that was finished. We worked on texts "Day and Night" and converted them into symbols...

After Effects : Session 2

We started the session by adding changes to our last project and making it better. We created an adjustment layer and added a fill colour with two masks one with subtract so we can target a particular area to distort. We added a function in the evolution of the wave warp effect. Then we had to warp the text so we added a turbulent displacement effect to that then animated it.  After this, we had to do a display of that composition on an old TV. We had an image in project files so we masked the whole foreground TV into three different layers and subtracted two of them. Then we added the final composition into TV as Tv was playing it in order to do that we had to use a corner pin preset so we can adjust the composition on the screen. After that was finished we also added some mov files of astronaut dancing to make it interesting. We added the background in retro TV composition and added blur and colour correction according to our liking. Now the fun part was to add a parallax effect ...